Showing posts with label crafty. Show all posts

Tuesday, August 21, 2012

My Long weekend......In instagrams

I hope everyone had a wonderful weekend. Mine was busy and lasted through Monday. 

I tried to relax, and shake off a cold that has been going around the house. 
But, no matter how hard a tried.....It got me. 
Because we collectively have been feeling bit funky...........Some comfort food was in order.
I made our favorite chicken breasts,.
This is the easiest dinner. It is so very tasty.


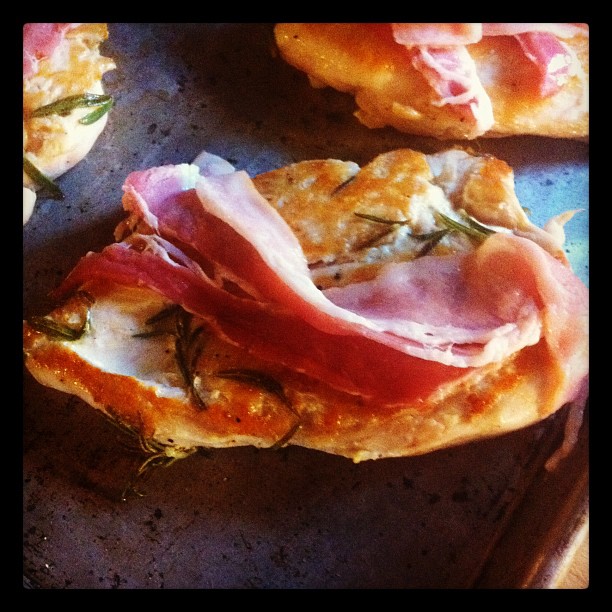
And Yes, That is Bacon!!!

You don't need a lot to make this. 
Chicken Breasts
Bacon
Rosemary
Olive oil
salt&pepper.

Pound out your chicken a little. Just enough so that all the breasts are the same thickness.
Toss them in some olive oil salt and pepper and a few sprigs of rosemary. Let sit for a few minutes to marinate.
Place your chicken is a very hot fry pan. Medium high flame hot.....searing hot!!!
Turn when the side are white, opaque and the bottoms are golden brown. Do the same on the other side. This should only take a couple minutes on each side. If your pan is searing hot.

(at this point I pour myself a glass of wine. Torrontés is a perfect pairing! )


Place that pretty chicken on a baking sheet. lay a piece of bacon on each breast. Put baking sheet in a 425 degree oven.  Bake until the bacon is slightly crispy and the chick is done. About 15 minutes.

I made a sourdough dressing and some potatoes to go with. Delish!!!


Served.

Next on the weekend agenda.........My Beautiful daughter Brene's 14th Birthday. I can't believe how time flies.
Each one of my girls are true individuals. But, My Brene' is wonderfully unique. She is artsy and quiet. You can't help but smile when she walks in a room. She is funny and quirky. Has friends that mean a great deal to her. She has a true heart with no drama. I love this kid!!!!!!


Her Birthday pancakes for breakfast.


Brontë made tissue flowers and hung them for her little sis.


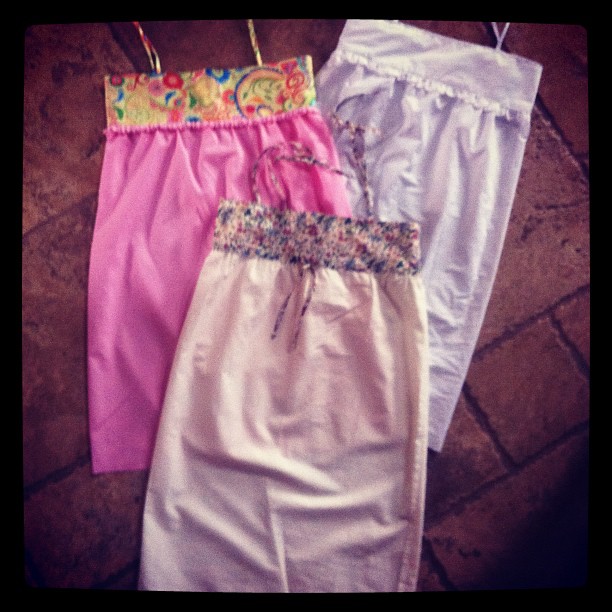
        I sewed her up these sweet nighties.


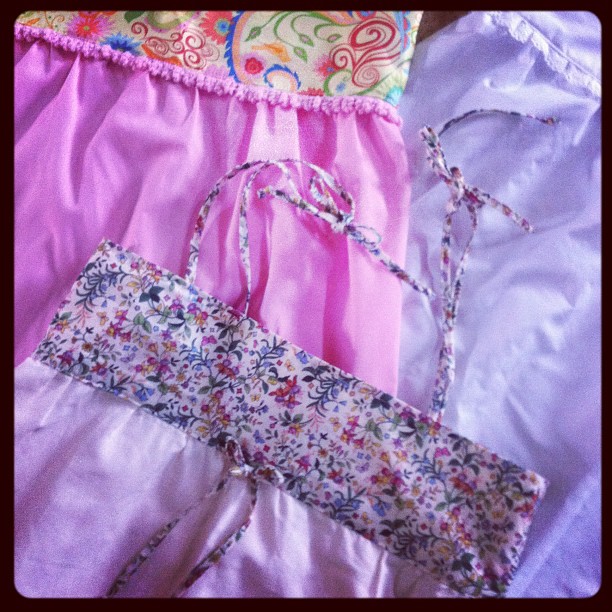
Added some lovely details to these cuties.
Found tutorial for these at Sew,Mama,Sew!


Her Birthday Sandwich....Her request.


 Finished it off with a oreo cake baked by Brooke.
It was such a sweet day for my sweet girl.


I got a little sewing of my own done.


On Monday......12 finished blocks. Yippeeeeeee!!!

I hope you liked the weekend journaled in instagrams.
Please follow me here.
Or  @myblueberrymoon

I promise I will follow you back :)
Have a great week peeps!!!!
Pin It

Friday, August 10, 2012

Time to Pony Up......


Back to school means back to doing 3 heads of hair every morning. 
I am not complaining .....At least the Big 3 do their own.
 It was 113 degrees here yesterday. Oh so hot!! 
So, If they don't leave with a pony tail in their hair.......they come home with one for sure.

These are our favorite pony tail ties.
They never break hair. They are really pretty. They work for all ages. And they look really cute when you use several colors.
The girls leave for school with them as bracelets. And come home with them in there hair. So cute!! They are very cheap to make. That way I don't have a cow when they don't come home. My girls loose a lot of hair stuff.........
They also make great gifts for their girlie friends.

Here is how I do it.


Get yourself some "Fold over Elastic". I buy mine from Etsy . (I'll post some sellers below) Scissors, ruler and a lighter or candle.

Cut pieces:

  9 inches for pony holders
20 inches for kid's headbands
22 inches for adult headbands.

     
1. Fold elastic in half
2. Tie in a knot at the end
3. Pull tight
4. Cut ends at a slight angle with very sharp scissors


This is what you should have.


Flare ends slightly like this . Then carefully run ends through a flame quickly. I use a lighter, but a candle will work.( Can't do it and take pic at the same time....sorry) 
This will seal the ends and keep it from fraying.


I made pony ties.


And headbands.


Made a ton!!


I put some on cards for gifts. Next time I think I will use paint chip cards :)

Places I've seen these sold......For way to much.
HereHere and Here.

Places to buy supplies......For cheap.
Here, Here and Here.

Hope you make some !!!
Happy Hair Dos ....


Pin It

Monday, February 13, 2012

Last Minute Valentines

Anyone need some last minute valentine ideas???? This is what we came up with..........


Got this Idea from Pinterest. I think it came out cute. Took the pic, added some text, sent it to 1 hr photo, punched holes for lollipops.....Ta-Da.......
This one was also found on Pinterest ....... Print from here.
This one was a creation by SuperGirl and her little SuperSis......Click here if you want to print out your own.


These candy bar wrappers are wrapped around Hershey Bars . We used stickers to seal the back.
So, to all of you out there .............
Have a "Pandalicious" Valentine's Day!!!!!!


P.S. I'm baaaaaack!!


Pin It

Friday, July 16, 2010

"Nakey Baby " 2 Dresses in 1 Tutorial

Nakey Baby Templates Are now Available in my Shop!!
I no longer blog here and can't keep up with the demand! But, I still want to offer this project!!
Go to the store tab on the top of page!!
Thank You!!!


It is 2 ,Yes 2!! 2 Dresses in 1.

 Do I sound like a salesman?I am a little bit. This little Dress is sooo simple to make.  Perfect for a beginner, Superfast for a sewer with some skills. You could whip up 2 of these and 2 nappy/diapers in a couple hours for a great gift. Any little girl would love .
So away we go,

Supplies
2 pieces of fabric 18"x20"
2 closures  (snaps ,buttons,Velcro or whatever you like!)
Embellishment if you like
Printed Template (link at the bottom of post)

This tutorial is so easy it hardly needs instructions...........


 Fold one of the pieces of fabric in half . Place pattern on fold like so. Cut one ....Fabric  #1.
 Do the same with Fabric #2.
 This is what you should have. Put the two cut outs right sides together, pin  then sew a 1/4 "seam all around the dress.
 Leaving a space open for turning. As I marked above.
 Turn right side out and press. Make sure to turn 1/4 inch in at the opening  to match up edge for top stitching.
 Now it looks like this.
 Top stitch all around dress very close to the edge. This will also close the opening.

Now we need to add some closures. I use snaps cuz I love 'em. Velcro would prabably work better. And buttons would be super cute ...if you feel that spunky. These photos are from the first dress I made with all one fabric. These shows where to put the closures.


Now ,on these two little dresses I added some embellishments. I applied them using fabric glue. Easy Peasy!!

 A butterfly on this one.
 View of the back.
 I stitched a blanket stitch on felt hearts here. The hearts cover up the snap backs .
 Sweet right?

 The cute little back.
I hope you enjoy making this little dress. It gives two different looks for the fashion minded baby. haha
Print template from link below.


Just to remind you ..you can find similar a  pattern here for your little girl. At SewBaby .
That will make a cute girl/doll matching outfits.

This is the last pattern for "The Nakey Baby Project".
I will do a wrap up next week an show off my dressed babies.
If you sew up some off these ideas , PLEASE show them off on the flickr page. I will also post some on the blog here! I really want to see what you do with these ideas.
Thanks to all of you who have down loaded the patterns, over 500 downloads so far !!!!!


How cute!! 2 babies in 1 pic.

Pin It

Sunday, February 28, 2010

Hey Cupcake........

Have you Guys seen the new issue of SMALL magazine. So great. As the kids and I  drooled through each page we came across this recipe for the "moist" amazing cupcakes.
Problem.......No cupcake liners. So being the crafty little buggers we are.
We made our own. They turned out pretty good, so I thought I would share.
You will need 24, 5" inch x 5" inch pieces of parchment paper.
The parchment paper I used was 15" inches wide . Easy math yeh!!
a 1/2 cup measuring cup
a glass that fits inside the measuring cup
Center paper over the glass turned on it's end.
 
Smooth over .

Press measuring cup over glass and paper, wiggle to set.
 
Put your paper cups in muffin pan. Fill with batter using a ice cream scoop .
They should look like this.
Bake!
 
 Frost. 
I used a ziplock bag with the tip of a bottom corner cut off.
Just fill with frosting and squeeze.

 
Sprinkle with sugar sprinkles.
EAT!!!
Super Yummy!!!
Sorta cute.

Pin It