Showing posts sorted by relevance for query Nakey baby. Sort by date Show all posts

Friday, June 18, 2010

First "Nakey Baby" Outfit...............

Nakey Baby Templates Are now Available in my Shop!!
I no longer blog here and can't keep up with the demand! But, I still want to offer this project!!
Go to the store tab on the top of page!!
Thank You!!!


Welcome to the "Nakey Baby" Project
 
Well here goes, 
This is the first time I have done a on-line project like this, so please forgive my "Newbie-ness"
Supplies
Scrap Fabric ( I am using knit but you can use terry.flannel, cotton woven or an old tee shirt)
Velcro 
1/4 inch elastic 6 inches should do it.
Templates printed out.(shown at the end of post )

 Print out and cut your templates.
Lay them out on the fold of your fabric as shown. The sleeve template does not need to be on the fold.
Cut 2 of each.
 This is what you should have. We will work on the diaper first.
 Pin diaper cuts right side together.

 Mark opening on the top back of the diaper cut. 
This is your start /stop sewing marks. This way you will have a opening to turn it inside out. Sew a 1/4 inch seam,  stitch around from mark to mark. Turn inside out and press.
This is what you'll have.


 At this point sew up the opening. Time to add velcro. Size the diaper on baby. Then add soft side of Velcro to front of diaper and Velcro hook side to back tabs as shown here. Try the Diaper on the baby.


 Now that was quick and simple....right. A great thing for a new sewer.
Sew a couple more for a set.


Now on to the top.

Pin sleeve pieces right side together on both sides of one body piece. Sew 1/4 inch seam to attach.
 It will look like this with both sleeves sewn.


Now attach  the other body piece to the un-sewn edges of the sleeves. It will look like this.

Then sew the side seams together. Start where the sleeve ends to the bottom of top. Use reinforced stitches at all starts and stops.
At this point fold down top edge of neckline 1/2 inch and sew. Leave a opening for the elastic.

Insert elastic cinch up to fit baby, then sew up opening. Your top will look like this now. Try on baby.
Cute right!! And quick. 
Since I am using knit, I did not finish edges of the sleeves ect. If you used a woven fabric, add a 1/2 inch all around the trapezoid shaped templates ..
That should give you plenty of room to hem.
If you want a longer dress just add to the length
 of the large top template.
Here are pictures of other sets I made with these templates.

 You can really dress up this diaper with some ruffles. Refer to this post for ruffle making.


This one has matching britches. I'll add that template next week.
I hope you like these patterns. Enjoy!!!

Here are the links to the templates, just click and print.

Tip: After printing and cutting the templates. Size to the baby you are sewing for by fitting the paper around baby if you need to enlarge or reduce size change your printer settings to suit.
My baby is 13 inches long.


Update: If you like this post please follow this link to see all the posts in this project.
Lots of cute doll outfits to make.
I will be adding even more on Friday.
" Nakey Baby" Project 
Pin It

Friday, July 16, 2010

"Nakey Baby " 2 Dresses in 1 Tutorial

Nakey Baby Templates Are now Available in my Shop!!
I no longer blog here and can't keep up with the demand! But, I still want to offer this project!!
Go to the store tab on the top of page!!
Thank You!!!


It is 2 ,Yes 2!! 2 Dresses in 1.

 Do I sound like a salesman?I am a little bit. This little Dress is sooo simple to make.  Perfect for a beginner, Superfast for a sewer with some skills. You could whip up 2 of these and 2 nappy/diapers in a couple hours for a great gift. Any little girl would love .
So away we go,

Supplies
2 pieces of fabric 18"x20"
2 closures  (snaps ,buttons,Velcro or whatever you like!)
Embellishment if you like
Printed Template (link at the bottom of post)

This tutorial is so easy it hardly needs instructions...........


 Fold one of the pieces of fabric in half . Place pattern on fold like so. Cut one ....Fabric  #1.
 Do the same with Fabric #2.
 This is what you should have. Put the two cut outs right sides together, pin  then sew a 1/4 "seam all around the dress.
 Leaving a space open for turning. As I marked above.
 Turn right side out and press. Make sure to turn 1/4 inch in at the opening  to match up edge for top stitching.
 Now it looks like this.
 Top stitch all around dress very close to the edge. This will also close the opening.

Now we need to add some closures. I use snaps cuz I love 'em. Velcro would prabably work better. And buttons would be super cute ...if you feel that spunky. These photos are from the first dress I made with all one fabric. These shows where to put the closures.


Now ,on these two little dresses I added some embellishments. I applied them using fabric glue. Easy Peasy!!

 A butterfly on this one.
 View of the back.
 I stitched a blanket stitch on felt hearts here. The hearts cover up the snap backs .
 Sweet right?

 The cute little back.
I hope you enjoy making this little dress. It gives two different looks for the fashion minded baby. haha
Print template from link below.


Just to remind you ..you can find similar a  pattern here for your little girl. At SewBaby .
That will make a cute girl/doll matching outfits.

This is the last pattern for "The Nakey Baby Project".
I will do a wrap up next week an show off my dressed babies.
If you sew up some off these ideas , PLEASE show them off on the flickr page. I will also post some on the blog here! I really want to see what you do with these ideas.
Thanks to all of you who have down loaded the patterns, over 500 downloads so far !!!!!


How cute!! 2 babies in 1 pic.

Pin It

Friday, July 2, 2010

More Outfits for "Nakey Baby" Part 1


Nakey Baby Templates Are now Available in my Shop:)
I no longer blog here and can't keep up with the demand. But, I still want to offer this project!!
Go to the store tab on the top of page.
Thank You!!!


Hello Everyone,
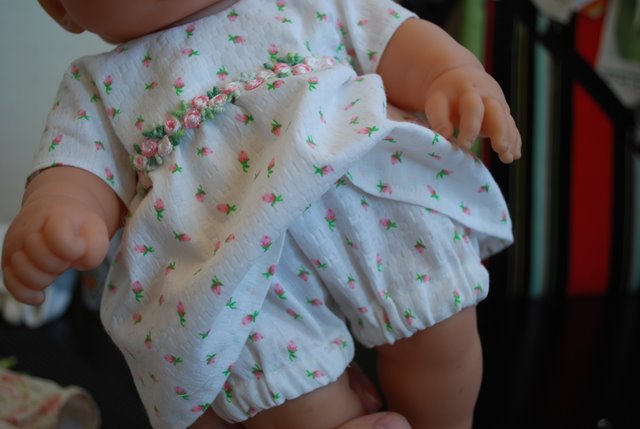
Here are some more baby doll outfits .By using a Three basic templates (at the bottom of post) . You can make countless little outfits with these easy peasy pieces.I will show you an simple, no little hem," Baby Bodice" that can be a top or a dress, and it can have long, short or no sleeves. The " Lil' Britches" Can be shorts ,  pants, bloomers or panties .This is kind of a long post so we will do it in 2 parts. Bare with me it will be worth it...... I hope.

For the cute little striped number pictured above....
Print your templates.
Gather some fabric and a little elastic
The Lil' Britches template will print as shorts. To make pants just lengthen 3 inches or more inches as needed.
Like this...


Layout like this.

Cut 2 of bodice and  pants. Then cut a rectangle that is 31/2"x20" inches
 Now let us sew. Stitch bodice pieces right sides together. This is a little tricky, I hope this makes sense.
you will sew starting at the bottom of the back, then up to the neck line and back down the other side of the back.
Then sew around the curve both arm openings. Leaving the sides and bottoms un-sewn.


Now turn it right side out: By attaching a safety pin to one side of the back of bodice and feeding it through what will be the shoulder it will be turned right side out. Do it again on the other side.


Press bodice after turning. Easy huh? and no itty bitty hems.


Now it is time to sew the sides together.
Open sides like this.
Open both front and back sides, Pinch  right sides together and sew. Then press.
Now you have a bodice that is ready to add a ruffle.
Fold the 3 1/2" x 20" rectangle in half , right sides together and sew ends. Turn inside out and press.
Use ruffling instructions here. Or use your favorite way to ruffle. ( you can cheat here and use lace or a trim)


Pin to front side of bodice and sew


Fold ruffle down press. Top stitch along ruffle line on bodice
Add closure of your choice. I like Velcro . Little snaps would be sweet.

Tip: If you want to make this a dress. Just cut a 5"x20" rectangle of fabric, hem one end and both sides .Sew on instead of ruffle.      For the dress below I also added lace.


Now for some Britches
With right sides together. Sew curved seams front and back.
Open the pant and align seams. Now sew legs/crotch . Turn right side out. Hem legs. Fold over waist, iron 1/4 inch . Fold over again  3/4 inch. Iron & sew for elastic casing.Don't forget to leave a 1" space open to insert elastic. Size elastic to baby doll, insert in casing. Ta da !!! Britches done.


                                                                     Next Friday
              In the Next Post we will ad sleeves and make bloomers/panties.  Like in these outfits.
 
Note:  I have now made about 10 outfits and a half dozen diapers for this project. Also some blankets. My nakey babies are nakey no more.I will be sharing more posts later.  One interesting thing I have realized is I use these same techniques sewing clothes for my girls. I have had a lot of ladies say to me. I quilt , but sewing clothes seems hard or not worth the time. For me I have been sewing clothes way longer than quilts. If you haven't sewn kids clothes before this is a great way to play around and see if you like it.  If you want to try making matching kid/doll outfits. Find a kids simple sewing pattern that has a bodice, sleeve and pant pattern pieces and sew up like these doll clothes. Your kid will be so happy.It will be very rewarding...I promise.

Templates
  Bodice 
Short/Pant Pin It