Thursday, August 16, 2012

Sugar Cookie Heaven.........


I had not intended to post about these cookies. But they turned out........ just that good.

My sweet girl BrieElly wanted to learn to bake cookies.
So, I found my old recipe for soft sugar cookies and away we went. 
I shot a few instagrams to remember the day. 
I believe this girl has the magic. Because they turned out amazing!!!! Just perfect. It had been years since I made this recipe.....I had forgotten just how good there are.
Brie said, "I bet this is how cookies taste in Heaven." I believe she is correct.
They are crisp on the outside and super chewy in the middle.
And they are pretty.
Pretty heavenly !!!

I have a couple secret ingredients that make them extra wonderful........Lemon and lemon.


Ingredients


  • 2 3/4 cups all-purpose flour
  • 1 teaspoon baking soda
  • 1/2 teaspoon baking powder
  • 1/2 teaspoon salt
  • 1 cup softened butter
  • 1 1/2 cups white sugar
  • 1 egg
  • 1 teaspoon vanilla extract
  • 4 Tablespoons sour cream
  • 1 or 2 teaspoons of fresh lemon zest
  • 2 teaspoons fresh lemon juice.
  • Sugar sprinkles for the tops.

How to Make


Preheat oven to 375 
In a small bowl, combine flour, baking soda, baking powder and salt. 
In a mixing bowl, cream together butter and sugar until fluffy. Beat in the egg and vanilla. Gradually blend in dry ingredients. Add the sour cream,lemon juice and zest. Give it a good mix.
Roll rounded teaspoons of dough into balls and place on a ungreased cookie sheet. They puff up like mad. So leave lots of room. Flatten slightly with a glass dipped in sugar. Sprinkle with pretty sugar sprinkles.
Bake for 8 to 10 minutes or until slightly golden Let sit for a minute .... then lift onto a cooling rack.
Cool then store in a air tight container.
If you want to keep them crisp and chewy. Store in a tin.

Tips.......

These tips are things I have taught the girls to make sure their cookies always come out fabulous.
Use your whipping attachment for your mixer to cream sugar, butter and eggs. Switch to paddle for dry ingredients.
Always make sure butter is at room temp. before using.
Good quality vanilla is worth every penny.
Cooling racks are a girls best friend.
Always try to make cookies all the same size for even baking.
And last but not least......... Boys don't like bimbos. 
They like strong good girls........So be smart, confident and bake them cookies.

Print Friendly and PDF


Linked here.......

Whipperberry


Pin It

Tuesday, August 14, 2012

I am" Breaking Dishes" around here............


Okay, not real dishes......
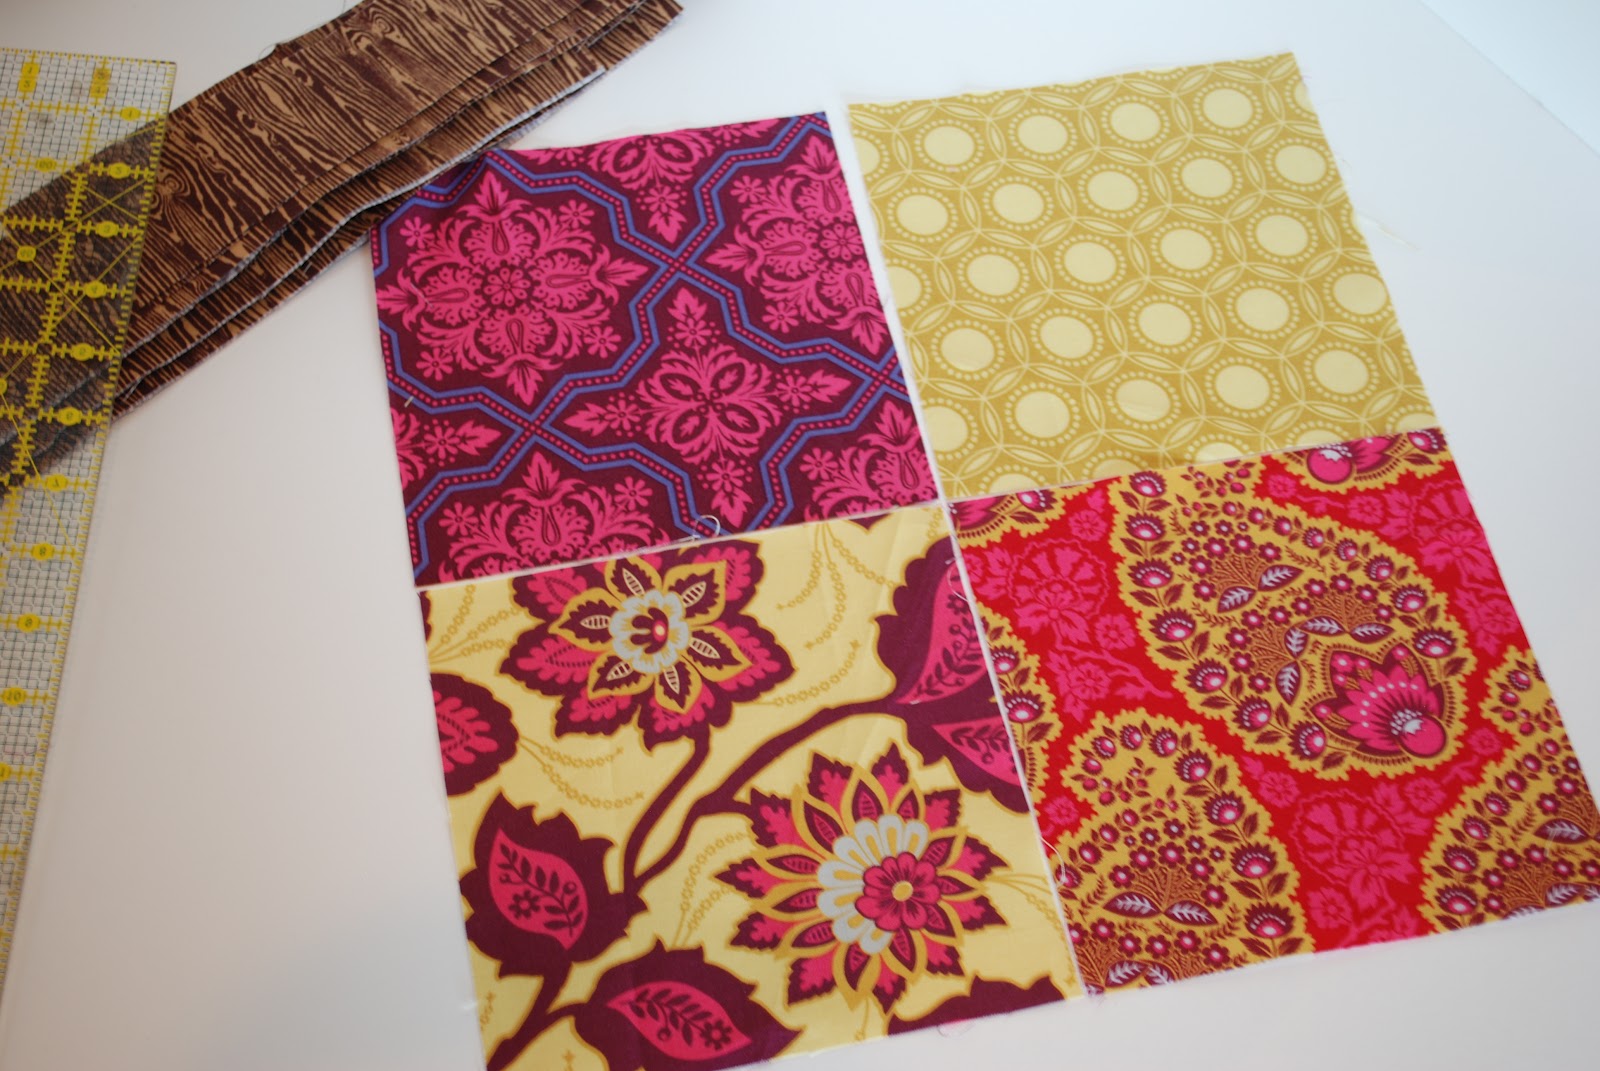
I have been making these blocks. Traditionally called "Broken Dishes". 
What do you think?? 
The Fabrics are from Joel Dewberry's "Heirloom" .
 I am framing each block in his "Woodgrain".
I am using these babies in bed quilt just for me...{sigh}
 A dream come true.....one for me:)
I knew I would have to choose something fast and simple...........Nobody will ever let Mom do something for herself .........for long anyway.
Can anyone relate?
Here is a quick tutorial on these super easy blocks. This would make a great beginner block!!

Each block uses four fabrics. Cut in Squares. I cut 7 inches.......I wanted a big block. Finished it will be 12 inches.
My border/frame is 2 inches........
So, when all is done.... the framed block is 15".


To begin we will make half square triangles.
Pair up two squares, put them right sides together. Repeat with the other two.


 Draw lines from corner to corner. Use a dark pen so you can really see the line. It will be used as a guide to sew and then cut.


Stich a 1/4 inch from the line... on one side. Turn your block and do the same on the other side of the line. That should leave your pen line with two stitched lines, one on each side. Now do the same with other squares......


Now cut down the pen line. Easy Peasy. Repeat with remaining squares.

  
Open each square and press flat. Trim each one to 6 1/2 inches squared up. This is what you should have.


Arrange Like so........... 
Then stitch squares together to make the block. I sew the top two together , then the bottom two. Match center seams and then sew top to bottom. Just like that...Broken Dishes.


 This one is sewn in a slightly different combo of fabrics.


Here is one with the border/frame.

 I'll be sewing twelve in all...........

To be continued.........

Ooh Ooh .....I am linking here.


Fresh Poppy Design
Pin It

Sunday, August 12, 2012

Sunday Munch...........


This is a re-post from a couple years ago.
Made the pound cake again.......Still Amazing!!

I love sunday brunch !! My kids call it "Sunday Munch". We don't get to do it as much as everyone likes. So, when we do it's super fun!!  Today we made this........


Bronte made Lemon pound cake, It was so good.!!!! 
She found this recipe ...
Got up very early and baked. The whole house smelled Amazing!!!!
(Tasted just like Starbuck's, No Lie)


I found another use for the "Hey Cupcake Liners"
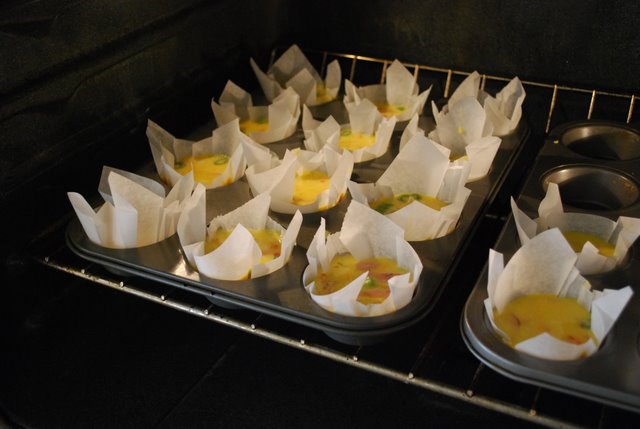
Little quiche cups. I didn't use a crust,  just filling. It was so fast to make. 5 min. to whip up the filling, and 15 minutes to bake at 350. I think you can use any frittata or quiche filling recipe. 
I just whipped 12 eggs with veggies, cheese and a little cream and it made 18 cups.
I think these would be great for Easter!!!


We sliced some oranges.............


Can't forget the bacon!!!!!


We threw in some grape juice mixed with seltzer water, coffee and some spiced nuts.


 Everyone loved the meal and it gave us all a chance to sit around the table and talk,
laugh and count our blessings.We have so many.
I hope you have a happy Sunday too.....

Follow my blog with Bloglovin
Pin It

Friday, August 10, 2012

Time to Pony Up......


Back to school means back to doing 3 heads of hair every morning. 
I am not complaining .....At least the Big 3 do their own.
 It was 113 degrees here yesterday. Oh so hot!! 
So, If they don't leave with a pony tail in their hair.......they come home with one for sure.

These are our favorite pony tail ties.
They never break hair. They are really pretty. They work for all ages. And they look really cute when you use several colors.
The girls leave for school with them as bracelets. And come home with them in there hair. So cute!! They are very cheap to make. That way I don't have a cow when they don't come home. My girls loose a lot of hair stuff.........
They also make great gifts for their girlie friends.

Here is how I do it.


Get yourself some "Fold over Elastic". I buy mine from Etsy . (I'll post some sellers below) Scissors, ruler and a lighter or candle.

Cut pieces:

  9 inches for pony holders
20 inches for kid's headbands
22 inches for adult headbands.

     
1. Fold elastic in half
2. Tie in a knot at the end
3. Pull tight
4. Cut ends at a slight angle with very sharp scissors


This is what you should have.


Flare ends slightly like this . Then carefully run ends through a flame quickly. I use a lighter, but a candle will work.( Can't do it and take pic at the same time....sorry) 
This will seal the ends and keep it from fraying.


I made pony ties.


And headbands.


Made a ton!!


I put some on cards for gifts. Next time I think I will use paint chip cards :)

Places I've seen these sold......For way to much.
HereHere and Here.

Places to buy supplies......For cheap.
Here, Here and Here.

Hope you make some !!!
Happy Hair Dos ....


Pin It

Thursday, August 9, 2012

Shoe Redo.............


It is Back to school time!!!! I am just plain giddy!! 
I love my kids, but I need some ME time.

Every year the kids and I have the same routine. Clean out the closets.
Sort things like this........
If it fits...keep It.
If it is too small ....pass it down to the next kid in line.
If it is torn..... mend it. 
If it can be refurbished....do it. 
If you don't love it..... Donate it. 

After that job is done. Then the shopping begins.With a BUDGET....... You would be surprised how they would rather have refurbished shoes.......Then they can spend there cash on fun new jeans, tops and accessories. 

This year while refurbishing the shoes........ I had a genius idea !! Instead of buying new shoe strings for the "Chucks".  MAKE SLIP-ONS !!!! 
Their shoes never stay tied anyway. Am I right??

The girls LOVE them!! They are super easy to slip on, look good as new and best of all they didn't have to spend the cash. New Converse All Star Chuck Taylor's are a whopping $40 now.


Let me show you how to do it.
First clean up your old shoes. ( I'll give great tips at the end of this post )

Grab 2 pieces of 1/4 inch elastic. Each 36 inches long for kids. 45 inches for adult.( Yes, the Men love slip-ons too)

And away we go............


Using the elastic. Lace up your shoes like you would with strings. Until you get to the last grommet ....


Go through the top and pull the elastic behind the tongue of the shoe. On the back of the tongue...... line up the elastic on the bottom of the label sewing stitches and pin.


Try to get it as straight as you can. We will be trying to hide our stitching in the shoes label.


This part is a bit tricky. Wrestling that shoe tongue under the foot of the sewing machine. But one you have it lined up. Put the presser foot down and sew. I made two lines of stitching here.


See the stitches? Kinda hidden......


There you have it....Slip-ons. They look shiny and new. But they also have that cool worn quality.
Can you believe those Blue ones are 2 years old and the red ones are on there 3rd owner and are almost 4 years old??? Breven wore them almost everyday last year. Now Bridgitt gets them , and she says they are super comfy ...and no strings to trip her up. She is 7.


One Chuck , Two Chuck, Red Chuck, Blue Chuck.............


A Few Words About Cleaning..........


Your going to need some stain remover spray, some oxygen cleaning powder and a Magic Eraser. These are the products I used. The bathroom Magic Eraser isn't needed. Regular will do. It is just what I had ...... If you have a cleaning brush it will help scrub them up.


This is how I do it.
Take out the shoe strings and disgard. Spray down well with stain remover and let sit overnight.
Then fill your sink up with hot water and a couple scoops of oxygen powder. Soak shoes for an hour or so. Then scrub up the fabric of the shoes with a brush and clean all the rubber and soles with the magic eraser. It is amazing how much I got off with the magic eraser. My oldest daughter had even written on her's with markers...........
After they look good and clean. Toss them in the washer on rinse and spin. That should get all the soap out. Then dry under the sun outside. 

Here is one before and after. I wish I had taken more pics of the really filthy ones. These weren't that dirty. But you get the idea........


So there you have it......
Have fun redoing the shoes. Pin It

Sunday, August 5, 2012

London Called......It was for Brontë.


Remember When I said London was calling?
Well look....It did. And it was for Brontë.
Quilt and pillow ..... Jolly good I'd say.   


    WARNING!!
        Here comes the quilt story....It's a bit long winded.

     When I was 19 I read "Wuthering Heights". Oh, I loved that book! I read it over the summer of 1986. It was a challenge for me. I love to be challenged. It remains as my all time favorite reads. The author of that great tale, Emily Brontë, I found fascinating also. I remember telling myself at the time. If I ever have a daughter. I will name her Brontë. 

     Eight years and two sons later, I did. And she, like the book, has been challenging. In the very best way possible. I have learned so much about who I am by raising her. She is fascinating, complicated, silly, kind, smart, thoughtful, creative, strong-willed and beautiful.

     On tuesday she begins her senior year of high school. She has plans to attend college. She is thinking photo journalism. I am thinking..... I never want her to leave !!!

      Senior years are so tough these days. The stress can be overwhelming for these kids. I have watched some of my son's friends get crushed under the pressure. And some achieve amazing things. I know what lies ahead for her. And it is a lot. The best and most challenging of times. As a mom I can only comfort her. The work and results are all up to her.

      So comfort her I will...
 With this pillow.
                               
 And this quilt.


    This idea came to me a while back.I was going to wait until graduation. 
But for all the reasons I will give. The time was now....

        I know in the days ahead, 
She will come home angry at something some dumb girl said....
"The Boy" will bruise her heart....
The testing will melt her brain....
The teacher just won't understand....

There are sure to be,
Rejection letters......
Failed awards....
Grades that didn't come out as planned......
Plans that seem like they will never succeed.....

But then again there will be,
Great test scores....
Amazing teachers....
Homecoming ........
The Prom .....
The acceptance letter...
Graduation celebrations....
The acceptance letter....
Saying goodbye to friends.....

For each of these moments in time. She can run home and  cuddle up with these gifts of love. She can cry tears of anger, happiness or fear. Scream into the pillow. Hide under the quilt.
But she will know she has a Mom that loves here......
And the goal is to just......
Keep Calm and Graduate on !!!!

More pics....


 If any of you out there have a Senior in your life...... I think this makes a great gift idea. 

UPDATE: Soon I will have the PDF template for the the letters and cap. Also included will be cutting and finishing instructions.  So keep a look out.......

Until then have some fun,
Make your own " Keep Calm" poster at

Pin It